Sing, child, of right and wrong
-Sisters of Mercy, “This Corrosion“. Eldritch, Andrew. 1987. Floodland. Merciful Release.
Gimme things that don’t last long
Gimme siren, child, and do you hear me call?
Hey now, hey now now, sing this corrosion to me
At some point in the last 47 years, the battery had leaked. This wasn’t a surprise. Clore Auto has a nice overview of the history of the car battery–so I won’t go too far down that rabbit hole here. The 1971 release of the sealed Delco Remy Freedom Battery marked a major change in automotive battery design–though the sealed battery wasn’t widely adopted until the 1980s. Since the 1980s battery technology has continued to develop with batteries requiring less and less maintenance (and less chance of leakage). Side note: the development of both battery companies and battery technologies was heavily tied to 20th century military campaigns.
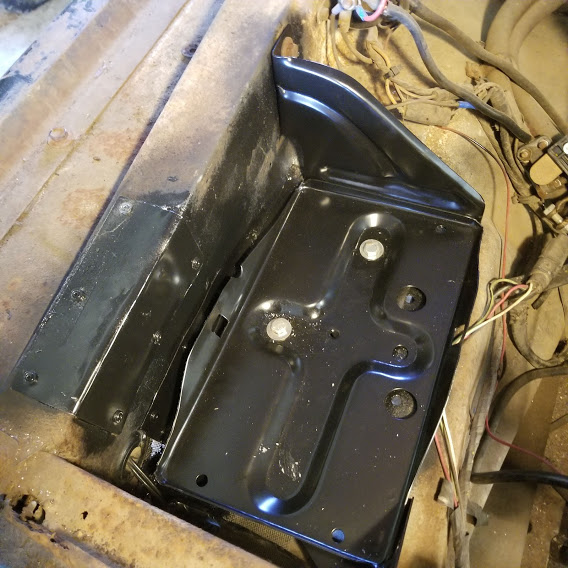
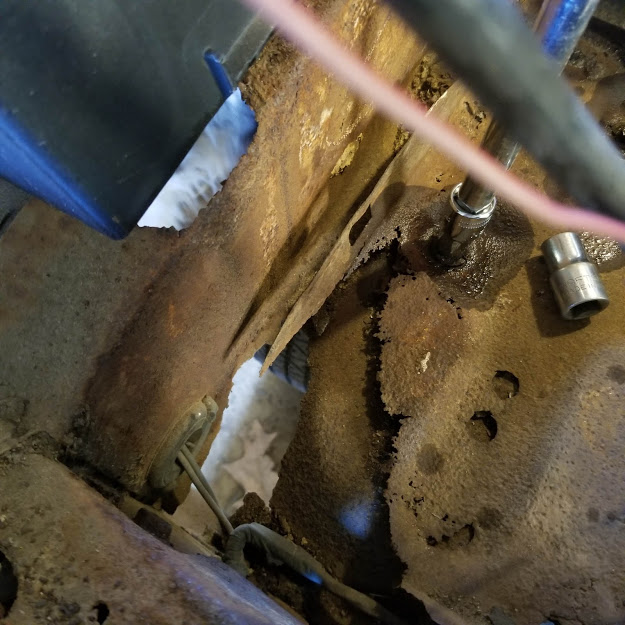
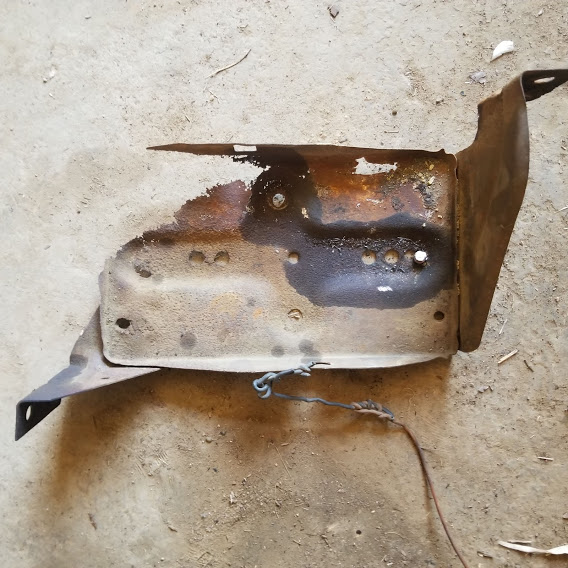
It doesn’t take much battery acid to do some real damage to metal, especially if it leaks more than once. Battery acid is a form of sulfuric acid, which reacts with the iron in steel car parts to form iron (II) sulfate. This would serve as a protective coating against more acid–except that it is water soluble and gets washed away easily. So, a little acid spills, and bit by bit it eats away at the metal. This forms a rough surface with pits, which increases the surface area for rust to form and for the next acid spill to do even more damage. In the image at the top of this post, you can see all the way through the battery tray and the fender well to the ground below. There is more damage underneath that we will be fixing later.
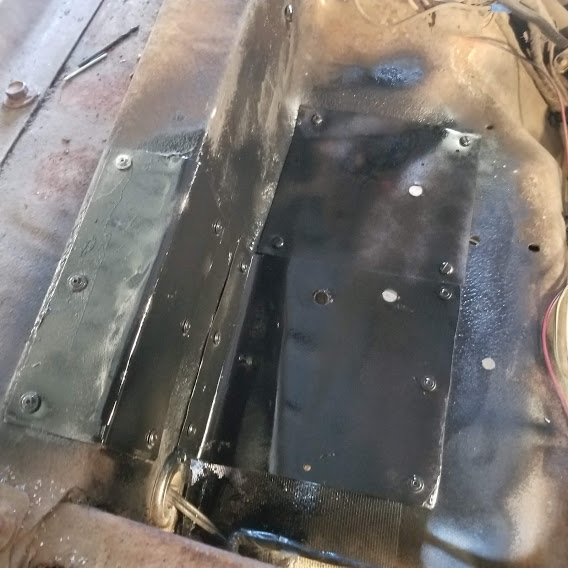
One of the best parts of this project has been seeing E. explore new skills. For this project, we weren’t just replacing a part–we had to do some patch work on the fender before installing the new battery tray. This involved cutting and bending new sheet metal, grinding away sharp edges, drilling holes, and installing rivets. In short–it is a process of destroying, recreating, attaching, and detaching.
A perfect restoration would call for replacing the inner fender, but we opted for removing the rusted spots with a rotary cutting tool and putting in new sheet metal patches. The new metal is thicker than the old, and has the benefit of a rust-resistant paint coat that the original lacked (in the 1970s Ford painted their vehicles after assembly, so the underside of the hood and accompanying parts didn’t get that protection.) Given that, the battery compartment should be good for at least another 40 years.